Scoob engine rebuild project

Let us know what vehicle you own & discuss it in here.
  • View unanswered postsView active topics
  • Scoob engine rebuild project

    Postby Cret » Fri Mar 07, 2008 12:50 am

    Right, after going through one engine already (not an 'engine' fail as such but the bearing in a cambelt idler pulley collapsed, meaning bent valves), it's time for the more recent motor to have an overhaul. After all, I've had the car roughly 8 years now, and she needs a little TLC!

    Reasons? Well for one, the clutch is WELL worn out in it so it needs doing anyway. I've driven her about twice in the last year or so on account of this needing doing and I'm getting fed up now.

    Secondly, the early Legacy heads are notorious for suffering from Tappet noise. There's tons of theories about exactly why (poor oil flow design, poor hydraulic lifters, clogging of the oilways etc), but the cure is to fit heads from an impreza. Imprezas and Legacies both use the EJ20 engine but all in slightly different variations, so a load of the parts are swappable.

    Only issue is that fitting Impreza heads also means fitting Impreza pistons so the job gets bigger & bigger. You can actually use the original Legacy pistons but they have valve cutouts instead of a dished crown so the compression ratio increases and that has unwanted side effects obviously in a turbo engine.

    So I figured while the motor comes out for the clutch I shoud sort the tappet noise too.
    Parts I've got so far ready to fit are:
      Pair of reconditioned STi heads with new valves etc.
      Set of forged STi pistons (can take more abuse than cast ones and will match the new heads)
      Apexi Hybrid RHF5 ball bearing turbo. This is a modified IHI VF22 (the biggest one fitted to imprezas as standard I believe :lol: ) so that it has a much better compressor wheel than standard, and an inlet elbow to fit certain scoob models.
      New turbo/downpipe gasket
      New head gaskets


    Still need to get a flywheel (mine has cracks in it), a clutch, and various other bits and bobs but all will be sorted in due course.

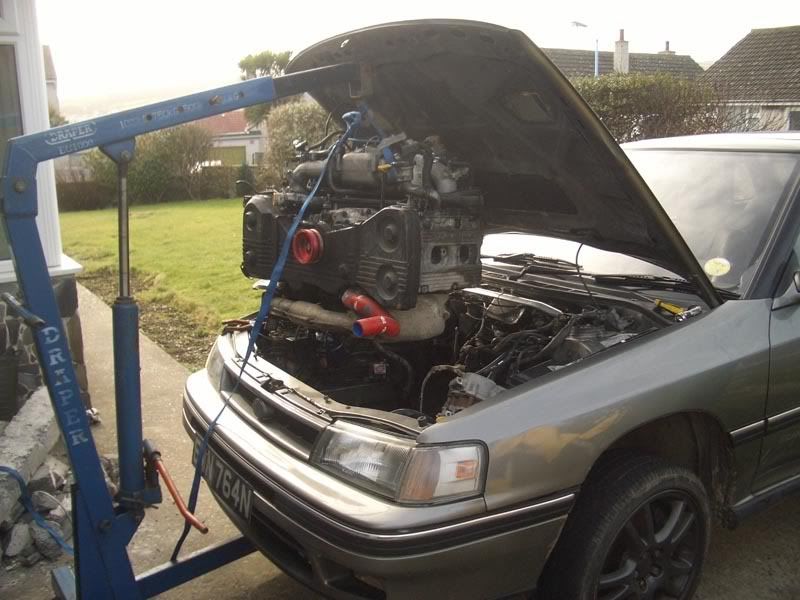
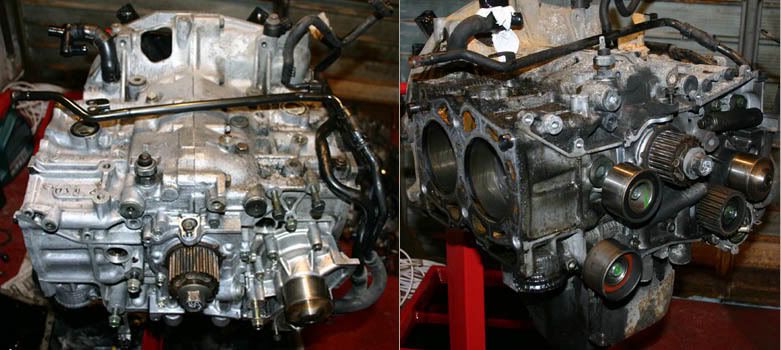
    Well seeing as I was due two weeks paternity leave I decided it would be the ideal time to at least get the engine out then when I get the odd hour here & there between changing nappies etc I can work on it.

    Engine was easy to take out by myself and took something between 2-3 hours without any help. Pleasant surprise!

    Plenty of pics to follow.....
    If you don't like my comments, don't cause me to write them. How simple is that! :)
    User avatar
    Cret
    Mod Team
    Mod Team
     
    Posts: 2326
    Images: 0
    Joined: Fri Jun 30, 2006 2:28 pm
    Location: Where there be Spaniards
    Vehicle Make & Model: RS

    Postby Cret » Fri Mar 07, 2008 1:39 am

    Right, here we go with some pics....

    First up, motor pretty much out of the car. Last time I took it out I wrote some procedure notes on near enough exactly what bits to remove/undo in what order and it made the job TONS easier & quicker this time. Didn't time it but was easily less than 3 hours. Quite certain it'll be a lot slower to refit due to the amount of checking & re-checking that needs doing to not balls anything up!
    Image

    Next up, look at this. One of the engine mounts decided to leave half of itself behind on the crossmember even though it wasn't attached when the engine was lifted. Obviously it was perished and a new pair will have to be fitted when the motor goes back in. Shocking!
    Image

    Next pic is how a scoob engine looks once the manifold is removed. There's a fair few pipes to remove to do this - hope I get 'em right when it goes back together. Was a straight in/out swap last time.... :?
    Image

    Now here's the motor with the heads removed - starting to look a bit smaller!
    Image

    Next, I noticed that you can still see the crosshatching pattern in the bores after all those miles!
    Image

    Now, a diagram to show how you can remove the pistons from an EJ20 engine without having to split the block(s?). Gudgeon pins come out through the side of the block then you turn the engine over and the conrods pop the pistons out. Very handy!
    Image

    Decided that while the engine is out (and seeing as I can't afford all the bits needed yet!!), I'd give various bits a bit of a clean & polish. Should make it all look a bit nicer once it's back together, and should make it easier to spot any horrible leaks etc.
    Image
    Image
    Image
    Image

    Think it should look nice & shiny when it's done! :lol:

    Oh yeah, not sure if someone in the subaru factory is a Star Trek fan....
    Image

    That's it for now but I'm quite pleased with how quickly I've been able to get it this far. :)
    If you don't like my comments, don't cause me to write them. How simple is that! :)
    User avatar
    Cret
    Mod Team
    Mod Team
     
    Posts: 2326
    Images: 0
    Joined: Fri Jun 30, 2006 2:28 pm
    Location: Where there be Spaniards
    Vehicle Make & Model: RS

    Postby ASTiMAN » Fri Mar 07, 2008 10:32 am

    Looks like a closed deck block - has it got the under piston oil squirters? Should be able to cope with some nice boost if you get decent rods in there aswell. Oh & I like the cam pulleys - are they standard, because my STi5 had 3 plastic ones which were duly replace for verniers.

    Have a look here Jim, just to wet your apetite and send you off on a tangent:

    http://bbs.22b.com/cgi-bin/ultimatebb.c ... 4;t=001271

    Kind regards
    Andrew
    ASTiMAN
    Regular Member
     
    Posts: 243
    Joined: Tue Jul 18, 2006 1:13 pm
    Location: Too much torque!
    Vehicle Make & Model: BMW 535d M Sport
    Vehicle Engine Size: 3l d twin turbo

    Postby Taken » Fri Mar 07, 2008 11:20 am

    At this rate jim, you'll have her back on the road by monday !
    User avatar
    Taken
    Regular Member
     
    Posts: 282
    Joined: Fri Jul 07, 2006 10:53 am
    Location: Douglas

    Postby Pugguy » Fri Mar 07, 2008 11:25 am

    Fantastic & nice to see all the pics....
    Your cleaning & polishing work looks great - I actually thought they were new parts before I read the text... What did you use to clean them?
    I reject your reality & substitute my own..

    Image
    User avatar
    Pugguy
    Site Admin
    Site Admin
     
    Posts: 3203
    Images: 1385
    Joined: Fri Jul 14, 2006 10:57 am
    Location: Isle Of Man
    Highscores: 2
    Vehicle Make & Model: Subaru Impreza P1
    Vehicle Engine Size: 2.0 Turbo
    Motoring Interests: Rallying, Vehicle modifications, Performance

    Postby DaveM » Fri Mar 07, 2008 11:41 am

    good work there mate, will be watching your progress eagerly 8)
    Image
    User avatar
    DaveM
    Mod Team
    Mod Team
     
    Posts: 1913
    Images: 5
    Joined: Fri May 04, 2007 4:07 pm
    Location: In my garage

    Postby starskyknight » Fri Mar 07, 2008 12:08 pm

    where do we queue up for ours to be done next?
    TV & Movie Cars: http://www.starsky-iom.com/replicar
    Manx Yanks: http://www.manxyanks.com
    User avatar
    starskyknight
    Advanced Member
     
    Posts: 601
    Images: 3
    Joined: Thu Mar 29, 2007 2:30 pm

    Postby tree » Fri Mar 07, 2008 12:45 pm

    Yeah good work matey!
    Love watching peoples projects with lots of pics!
    Quocunque jeceris stabit
    User avatar
    tree
    Site Admin
    Site Admin
     
    Posts: 3455
    Images: 0
    Joined: Wed Jun 28, 2006 2:29 am

    Postby Cret » Fri Mar 07, 2008 3:26 pm

    Thanks for all the comments folks.

    The bits have been cleaned up with Gunk (or similar stuff) in my parts washer and using a wire brush either by hand or a drill brush on some bits.
    I've then used some metal polish I've had for ages with a felt bob on the drill. I think the pics actually make it all look slightly better than they really are but will be a big improvement anyway. :)

    Pity there aren't lots of nice chunks of aluminium there as I would be anodising it if there was! Might have to see if I can make any small parts so I can do that.

    Andy - yes mate it is a CDB, a lot of early Legacies have them. Not sure about the oil squirters yet but I'll find out when I take the pistons out to fit the STi ones. Would love to fit posh rods but I can barely afford all the bits I already need never mind extras like that sadly. Should make for a fairly strong motor though anyway.
    I'm aiming for around 370bhp once I get back into doing the mapping again, although I'll need bigger injectors as they're only 440cc at the moment, and they won't get even close to that.
    Already got loads of other supporting stuff on the car like better pump & FPR etc. Thinking about doing the parallel fuel rail mod too whilst it's all in bits.
    The cam pullies are standard yeah. Again, Legacies tend to have metal pulleys whereas a lot of Imprezas have plastic ones. No idea why...

    I'm also hoping to do another in car PC so that I can use it for map tweaking on the go instead of using the laptop. It would also make it very easy for switching between completely different sets of maps without the need for the laptop again. :)
    If you don't like my comments, don't cause me to write them. How simple is that! :)
    User avatar
    Cret
    Mod Team
    Mod Team
     
    Posts: 2326
    Images: 0
    Joined: Fri Jun 30, 2006 2:28 pm
    Location: Where there be Spaniards
    Vehicle Make & Model: RS

    Postby ASTiMAN » Fri Mar 07, 2008 5:59 pm

    Know what you mean about the rods - mine cost over £900! Although that was a custom order from Arrow to suit the 2.33 litre bored and stroked set up. Standard Sti rods will be fine for your power levels and if you're after some 550cc injectors, talk to Mark Aigin @ Lateral Performance. Could you not increase the fuel pressure on your 440's though to cope with 370bhp? Mark might be able to modify your existing injectors - worth a phone call. 0208 420 5444.
    ASTiMAN
    Regular Member
     
    Posts: 243
    Joined: Tue Jul 18, 2006 1:13 pm
    Location: Too much torque!
    Vehicle Make & Model: BMW 535d M Sport
    Vehicle Engine Size: 3l d twin turbo

    Next

    Return to Members Vehicles & Projects

    Who is online

    Users browsing this forum: No registered users and 35 guests

    cron